How to Make Bespoke Envelope Liners Using Blank A4 Paper
Posted by Sophie on 25th Feb 2021

Envelope liners have become a trendy way to add accents to wedding stationery and greeting cards. A liner is simply an additional piece of paper or cardstock that lines the inside of an envelope, adding a pop of colour and personality to your invitation or card while increasing its weight and feel. A liner can be made with something as simple as a piece of blank A4 paper.
Why Buy Envelope Liners? Make Them with Blank A4 Paper!
When a person opens an envelope, the liner on the flap is often the first thing they see. By using a liner or buying lined envelopes, you can complete the look of your invites or greeting cards. The liner also gives the person receiving your card or invite a preview of what to expect from your wedding.
For instance, if burgundy is one of your wedding colours, you can use it as the liner of your envelopes. If you have a beach wedding, a liner with a palm design will reflect your theme.
Envelopes with a stiff lining are usually associated with stationery from high-end stores. They’re also sold as separate items that you can combine with your envelopes.
But rather than spend a pretty penny on envelope liners, why not go DIY? With a bit of blank A4 paper and envelopes in your colour, size and finish of choice, you can create bespoke envelopes with fancy paper lining to match your DIY wedding invitations or save-the-date cards.
In this blog, we’ll provide you with a step-by-step guide on how to create envelope liners using paper supplies available here at The Paperbox.
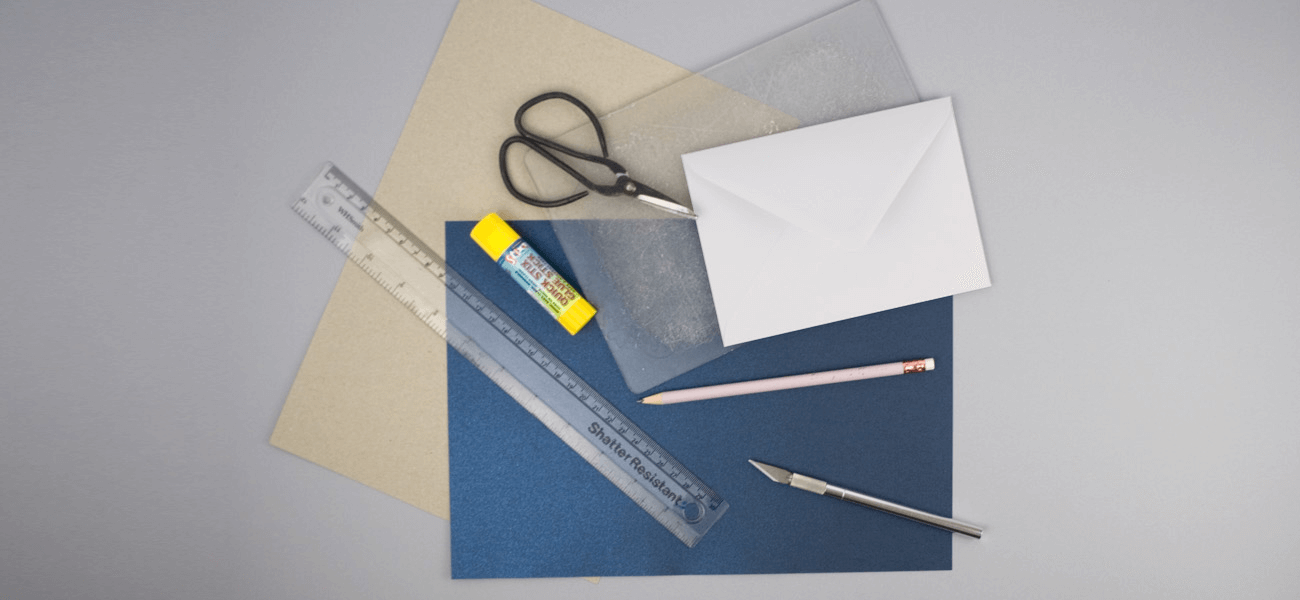
Crafting Materials You Will Need
- Envelopes (to make this project fast and easy, get envelopes in the same style and size).
- A4 paper in your colour, finish and texture of choice.
- Greyboard/cardboard for the template.
- A ruler.
- A cutting/craft knife.
- Scissors.
- A pencil.
- A cutting board/mat.
Step 1
First, we need to create a template using the greyboard/cardboard. This template will be the outline for your envelope liners.
- Start by tracing around the envelope onto the greyboard/cardboard.
- Once done, use the craft knife and ruler to cut out the rough template. Remember to do this on a cutting board or mat to protect your surfaces!
You can see we've used straight lines and haven't cut around the rounded points — leave them for now, we'll trim them off later.

Step 2
Next, we’re going to trim the template’s sides to ensure your inserts fit snugly in the envelopes.
- Measure 2mm in on each side of the template. For accuracy, measure in at the bottom and the top, and then match the two points up.
- Once measured, use the knife with the ruler to cleanly remove the pieces from each side.
The template should now fit width-ways into the envelope. If the sides don't fit, take a tiny bit more off of each side.

Step 3
Now to sort out the height!
- Take your envelope, and measure from the tip of the flap to the edge of the gum. Whatever measurement is taken here, remove it from the bottom of the template.
- Next, put the template back into the envelope to check the size. If the template is overlapping the gum still, take another sliver off of the bottom.

Step 4
Now it’s time to round the corners.
- When you're happy with the fit of the template, use the scissors to carefully remove the rounded corners.
- You should still be able to see the lines traced at the very beginning on the areas that need trimming.
Your template is complete!

Step 5
It’s time to cut your paper using your template.
- Trace around your template on the paper of your choice and cut out.
- For this step, we cut the template using the knife to get those sharp, crisp lines, and then we went back in with the scissors to round the three edges.

Step 6
Now for the best part — seeing how the inserts look with your envelopes.
- Place your liner into the envelope. Fold the envelope flap and liner down together and firmly crease.
- Once this is done, pull the envelope flap back and glue the back of the liner to secure.
- Allow the glue to fully dry before placing your invites or greeting cards.

Finished!
Use your template to create multiple liners for the same size and style of envelope. You can also repeat the steps above to create a new template!
If you struggled with any of the steps, watch our video tutorial below.
Over to You
For all your DIY wedding invitation needs, The Paperbox has you covered. Explore our range of paper supplies, card blanks and envelopes, and get FREE standard UK shipping on orders over £3.50.